Sunday, February 17, 2013

Work Day 5

Today we could not do very much because in Sunday Oklahoma is pretty much closed.  We wanted to get started laying out the cabin floor with marine grade plywood. The local store has two sheets left so I asked them to set it aside but of course could not work on it today because they were closed.

So we continued to clean the hull and get rid of fiberglass dust.  We also used a broom to get the last piece of flotation foam out of the bow.  As of today their are no longer any plastic "dammits" aka beads in the boat.  The shop was happy to never see those things again.  We took a more detailed look at the bilge fiberglass which was starting to mold.

This is black mold on the bottom of the bilge box.  It can be cleaned up by bleach.


With no plywood we began to tackle the keel.  So we grinded away to see what we would find.  It wasn't pretty. The keel was damp, not oozing with water but damp.  There were some splits that just continued into the keel. After 2-4 grinds we decided not to grind anymore and follow. We drilled two holes to help dry it out.  When I get epoxy in next week we will inject it into the cracks and then glass the crap out of it.  Should be ok.


See how the crack just keeps going back....This was after two grinds...

Not sure what exactly the keel is made of it looks like hardened foam with lead chunks in it.


 Having only spent an hour working we started looking at other projects we can tackle.  We came up with two.  First to look at the "dent" in the side of the hull from the trailer.  Basically trailer supports were too thin so it was putting pressure on the hull. I suppose it didn't help that we had to stand and work in the boat all the time.  So its kind of a priority to fix. It will also affect painting the boat.  There is no damage to the fiberglass as seen from the inside of the hull but its an obvious dent.  So to release some pressure we took out the wood chunk pressing the spot.  With the spot off pressure, it didn't pop out but the trailer needs to be rebuilt so this does not continue and we can paint.  Not sure what the solution is here.  May be to just leave it.


This is the wood pressing against the boat.


So we thought about how to relieve the pressure and take the boat off the trailer. Without boat stands its pretty tough.  I called a place in tulsa and asked to rent they will get back to me next week. I am not willing to spend $400 on boat stands.  One solution is to use the shop's hydraulic car lift with straps attached to lift the boat up. If the shop is ok with this, we will have a solution to relieve the pressure and paint the boat.  I would prefer this.


Saturday, February 16, 2013

Work Day 4

12/16/13
   Today we finished ripping out the central floor of the cabin.  Before we did there was a lot thought that went into how to do it.  Once we got rid of this floor there would be no place to stand inside the boat that could support our weight.  The fiberglass hull is designed to support at least 52 lbs/sq inch because this is the pressure of sea water.  But to put 150 lbs on a small area would probably not be good for it. 


Preparation: What to do with the bilge and keel bolts.  I was really nervous about this section.  I don't know that much about keel bolts other than they are supposed to support your keel and you want to make sure they are not rusted and serviceable.  I knew the keel would not fall off if I un did the nuts grounding it to the fiberglass, but I don't want to mess with structural integrity of the keel. After doing some research it seems as though the bolts are primarily for support and integrity in running aground.  So, it would be ok to unbolt them if they are left alone.  

One might ask why not just leave the bilge alone and build back around it?  Well, part of our leak problem stems from the bilge. There are several cracks in the fiberglass in the bottom which have lead to leaking below decks.  I could just try to glass over these and leave the bilge where it is, but run into the same leaking problems potentially. So I opted to cut around the bilge and then deciede how to remove it.

Leaky bilge....leaky bilge....


Once I removed the keel bolts its was obvious that the bolts were new the person didn't know what they were doing.  They were not sealed in there!!! So water just leaked along the bolts through the bilge which led to a little mold build up on the bottom of the fiberglass bilge.  

You can see the black part indicating water penetration

See the cracks? Also note the displacement from the rod to the fiberglass.
This meant the box had to be pulled and remolded or at least repaired.  So we went about cutting out the box.  We supported ourselves while cutting on two by fours.  This allowed us to be pretty much anywhere in the cabin without really putting weight on the fiberglass hull.  The actual cutting took about 30 minutes to get through all the wood and strong fiberglass.  The integrity was impressive for 40 year old work that had no support under it.  

Here is a picture of success!


After we popped off the bilge box what we found under it was lots and lots of caulking/marine glue.  Some of it was damp so I hope drying this out will solve most of our keel problems.  I am not comfortable with relaying this, and it looks very stable so I am going to leave it alone.  

We spent the rest of the day prepping the hull walls by sanding them down to be ready for fiberglassing when it arrives next week.  Then we finished up with the shop vac sucking out all the fiberglass residue. By the end of the day myself and the tools were all coated in a white dust cover.  Which reminds me to plug safety here. Working with this stuff is really bad for your health, make sure you are wearing a respirator and gloves as well as covering all body parts. I have a full white suit but did not break it out because we didn't do that much sanding today. Just wore long sleeves and pants. When we paint I will go full body suit.  

One of the things we found which was a real pay off was some really rotted plywood below where the metal mast support would lay.  Dan thinks it was originally 3/4" plywood that has swelled up to 2".  It is so wet to the touch you can squeeze water out of it, and you can tell it was bending under pressure.  This was a great find that will need to be replaced.  Without ripping up the deck would have never known!  Once we replace this the mast will be able to lay solidly!
You can see the glue holding in the bolts and keel and further forward the rotted wood below the mast support


The great thing about the end of the day was how dry the hull was, there was no standing water (it all seemed to be in the foam bricks).  There seemed to be no damage to the hull from the section we cut out. We will need to look at the forward section more, there is still some foam in the bow and the deck covers what we have access to.  For tomorrow or the next day though....

This is the remaining floatation material in the bow....


Tomorrow we will start the wood prep by tracing the hull outline and prefabricating the marine plywood for laying in the hull.  Then we will glass next week and lay the plywood in.

Today's work was about 5 hours or so.

This is looking aft, note the compartment aft is sealed air tight to float the boat if the cabin area is punctured.  There is some water leaking in from standing water which we dried up.  This bulkhead will provide a model for how to install our plywood bulkheads for the main cabin.

Planning Planing Planing

So with all this ripping up of the boat, you may be wondering if I am a professional Chop Shop.  Not the case, I actually want to rebuild the boat ha ha!  So before we rip anything out we have a plan to install new items.  This post is to outline a few ideas we have going for restoration.

The Cabin:

Bolero's wood benches
The outside Cabin, is by far the biggest project.  Because we needed to rip it all up to dry out the boat and confirm everything was safe and stable, we needed a rebuild plan.  Luckily my internet research paid off, one of the boats I wanted to model my purchase after had an extensive blog about rebuilding it day by day.  In part, why I am blogging my progress.  In this blog, they basically have an similar empy hull situation, except they keep the floor middle floor section on their boat (we will gut ours).  Then they installed beautiful wood seats to the boat hull and to the solid fiberglass floor. They were stained and looked great.


You will noticethat the actual wood work surrounding the cabin on this model boat is quite similar to the Luders 21' stock woodwork (except that the seats are fiberglass).  

In this picture of Bolero's restoration you can see the prep that was done to install the wood benches.  This visual helps you to understand how the situation will be similar to ours.  The plan of attack is to simply glass up the hull some more and then mount the benches directly to the side of the hull.  The running debate is what to put on the bottom of the hull.  Dan suggested we do plywood supports similar to this:
 
http://www.boatdesign.net/forums/boat-design/glass-over-ply-rebuild-34113.html.  
Then we lay down wood slats across the bottom of the floor atop the support plywood and that will be the bottom.  Similar to the picture below, however the entire floor wood be wood slats.  I want wood slats on a portion of the floor. However, I could see the entire bottom as wood slats problematic.  Primarily because of dropping an item and then dealing with moving slats to get to it.  Also, water accumulation in the bottom of the hull would be another issue(or rather in section s of the hull).  Of course we are going to prep all the fiberglass with epoxy and primer anyway to stand up to anything we through at it.  My current opting is use the plywood supports dan is proposing and then lay plywood and fiberglass over the top to make a solid deck. Then create a bilge area with wood slats.  One advantage to Dan's idea is easy access to the hull and bottom of the boat for drilling (adding speed meter) or checking for waterThat is the basic layout plan for the outdoor cabin.
The rest of the boat doesn't need much planning, the aft and forward deck is in great shape just needs to be repainted. One issue I found is that the deck hardware was not properly sealed to the deck so there is some leaking around deck hardware. I will address this and remount deck hardware.  On the top deck, when it comes to repainting I might just sand and do wood teak style deck. I already know money will not allow for teak, but maybe cedar.  This of course is far down the road so we will evaluate budget when we arrive at that point.  

Below the water line:
We have several projects here.  Primarily the keel split.  After further investigation this split was most likely natural (the keel is made of two molds) or accelerated by water dripping and freezing in the keel. after drilling a check hole in the bulb I did not find water but did find damp wood. After checking a day or so later, it seemed as though the paint had dripped and indicated water seeped out.  This really means we need to dry from top down, and gut the cabin which we did.  Then I will drill maybe 5 holes in the bottom of the keel.  Use a light or heat gun to dry out.  Then plan to address the keel split further up by grinding and drying it out for a day or two.  I ordered fiberglass repair kit from west systems two days ago so it should get here soon.  After the keel is repaired I will fill the keel bulb drying holes with epoxy and then fair them out.  After that we will work on the two machine drilled holes.  Then finally we can begin to address painting.  

Painting the bottom will be quite a task.  We will start by chipping paint off which I think will knock out 25% of the boat paint because it is cracking in several places.  Then we will sand the rest down.  After that we will work on putting a barrier layer/primer layer down to prevent chicken pox.  We are thinking of a light bottom paint, because the boat will go faster and I do not plan on keeping it in the water for extended periods. I do want to just come to the boat sometime at the dock, but don't really want to pay for a dock the whole time and leave the boat there.  Plus the lakes are all some hours drive from me.  So it will be better if I plan it as a day trailer sailer.  This allows me to add light paint with less toxicity like VC-17 freshwater from Petit.  After putting on the bottom paint I will work on the side hull blue paint as well as the boot stripe.  Finally we will put back on the boat name....which is TBD.  Been told it is bad luck to rename the boat, but the jury is still out on a name.  

Canvas Cover- Depending on what kind of deck I end up installing I will make a cover for the entire deck or just for the cabin.  We will see, but this will be one of the last projects.  

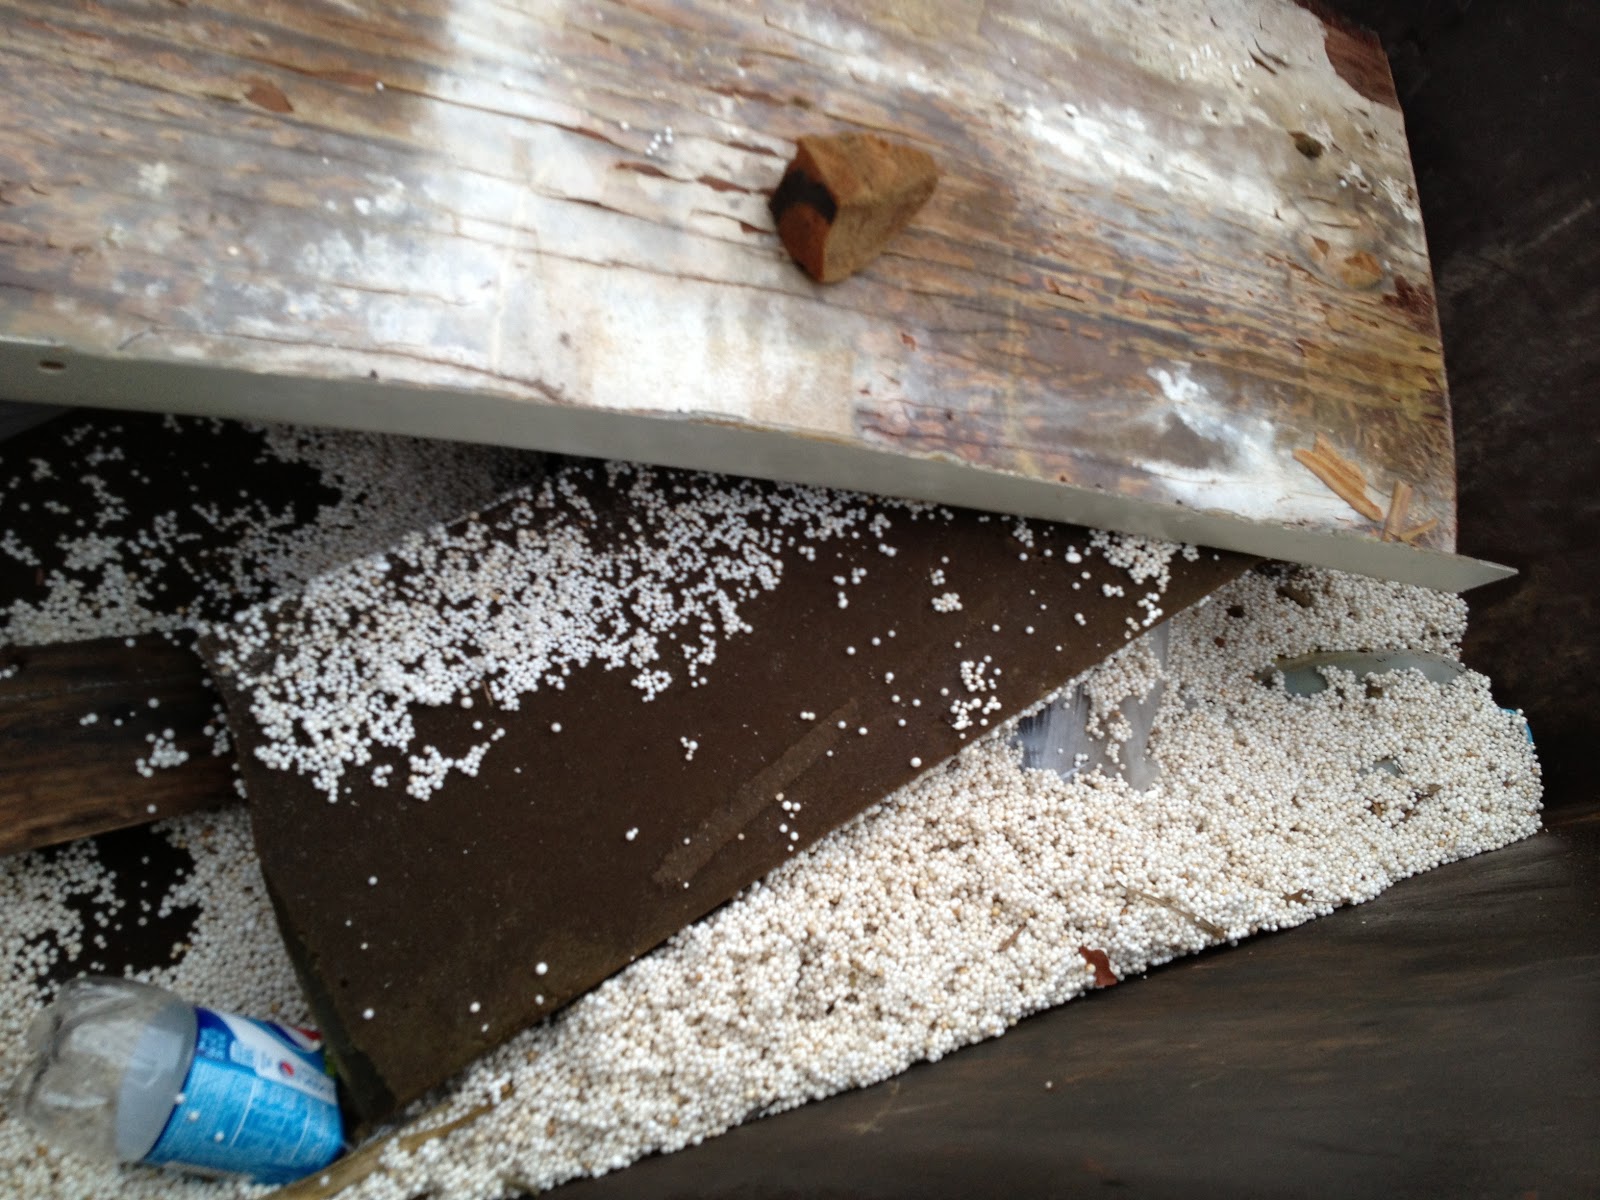
Float How?  One thing I realized as we ripped out all these stupid styrofoam balls is, we will need to replace them at some point.  I am still researching how much flotation I legally and practically need. My view is that this boat will be in a lake always close to shore and if the fiberglass is punctured, well its not the end of the world if it sinks.  Would I be pissed yes, enough to make it unsinkable pouring foam atop foam? no.  When we take out the cabin seats, where foam was primarily, we will need to find a new location for foam. One option is just to place it in the bow and aft compartments and seal them up. I am all for this, it is simple and balances the boat.  The issue is how much foam to buy and what type. For this I need to calculate my buoyancy requirements.  Still looking into it but a ballpark figure is 14 cubic feet of 2lb density foam. I prefer to use foam that fills voids in chemical reaction as opposed to the blocks. But I have not looked at the price difference.  So we will see.  This is probably an issue I will phone a friend about. 

Work Day 3

2/15/13
Today we tackled the right side seat in the cabin.  According to the surveyor the seats had the highest moisture content so I wanted to look at them to understand what 35% moisture looks like w/r to the fiberglass delamination.  After yesterday I had mixed feelings, it was good to get all that wet and watery crap out which we never would have dried out by waiting or heat guns.  However, I still really don't know what to expect in the central area we are stepping on, is it full of water? Is the fiberglass molding etc...  I am hoping today will give us good insight into the overall shape of the fiberglass hull.

So it was pretty quick work after ripping out the left bench the day before. We got in quick with a sawzaw and an angle grinder.  The back part of the bench is a pain to cut because it is under the lip of the deck and if you are not paying attention you can puncture the hull.  So the trick is to cut close but not too close. We will go back and grind down the remaining lip later.  We did not take out as many foam pieces from the starboard side but we did take a few from the bow area.  The seat was in considerably better shape with little delamination and rot in the wood, the port side was far worse. However there was one bad find.  Looking forward  on the starboard it was clear how rotten the wood was in the "cabin" area.


Look at the starboard side forward and you will see there is about an inch between plywood and fiberglass, it has really rotted and expanded. This means we will most likely replace the forward deck as well :(


We junked quite a bit over the last two days, here is a quick pick of our dumpster full of "fillings".  Those foam balls were a pain in the ass to clean and even after vacuuming carefully they still got everywhere.  Apparently when the garbage truck came for the dumpster it was quite a disaster....glad I wasn't at the shop then!
Here is the port bench and you can see the wood condition


Speaking of the shop we have a really great deal.  Storage is $2 a day and then working is $1 per hour outside with all the tools you can imagine for free while you work.  You name it they have it.  So I want to keep these guys happy with me, even though I mucked up their shop with all these damn balls. They are all over the yard. Ehhh what you gonna do, we were pretty clean about it and they are mostly all gone.

Here is a quick shot of the boat with both sides cut out.  Surprisingly the center is still really stable and held both dan and I on at one point.  There is nothing below the aft end of the center cabin floor (plywood and fiberglass), and the forward portion is reinforced by a fiberglass bilge rectangle that bears most of the weight.


A quick pic of Dan working on the port side of the boat throwing out rotted foam core into the dumpster

Tomorrow we will tackle the remaining floor and cut it out.

Work Day 2

Feb 14 2013
        Today we actually started working on gutting the boat. I suppose I should qualify "we."  Without my partner in crime Dan none of this would be possible.  Dan was nice enough to lend his truck for the road trip to Oklahoma and help out in technical expertise with tools and engineering.  The guy after all is an engineer so should be good to have.  Both of us enjoy doing this project and see it as a challenge to complete.  While Dan heads up technical side of our team, I cover the more sailing and boat maintenance side for boating specific tasks (bottom paint, reglassing etc...).  Needless to say though Dan is a key part of the boat restoration project.

As I began work today I was really nervous about what we would find under the fiberglass, this would tell us how much work we had. Sort of the pandora's box of prices for how much we will have to restore and buy.  Based on all the water coming out through the drilled hole (a constant flow/slow drip) I knew we had a lot in the hull.  The first place we worked on was one of the side benches. It looked as though someone had already sawed a small line along the inside of the bench. Simply by pulling and cutting a few more places we ripped this piece right off.
This was taken after we cleaned out the inside.  But shows where we ripped out.  
Inside we found green foam core blocks about 3'X1' with lots of white bubble balls.  All of this was used for flotation of the boat if the fiberglass was punctured, a federal law.  The core foam blocks were green and looked like the kind you use for fake plants in a vase.  These bricks were soaked with water or iced over and weighed probably 20 lbs a piece(they are not supposed to be wet or weigh that much). So they had been soaking a ton of water.  We probably took 20 of these peieces out of the right side alone.  Then we used the shop vac to suck out as many little balls as we could.    
Me holding the green foam the way we found it. The entire bench was stuffed full with these bricks, you can see how soaked it is and that it is really old so probably stock 1971!
After we removed all the foam we went exploring to try to see what was under and around here.  We weren't sure if it was a sealed compartment or continuous.  We found it this area runs all the way to the bow and the port and starboard side are not separated.


You can see here how damaged the plywood top is, which is the highest moisture reading on the boat at about 35%.  This view is looking towards teh bow, you can see how the foam balls lay with the foam bricks. 


With the left side done we called it a day and decided to rip out the right side tomorrow.  We spent a total of about 2 hours today working.

Friday, February 15, 2013

Work Day 1

2/13/13
Today I gave the boat a well deserved cleaning and wash down to get the years or muck off the surface.  Took it to a great little shop we have that stores the boat outside covered for $2 a day and all the tools we need for free!  Sweet deal.  After taking a more detailed look at her there are several projects that we need to complete.  Below are just a few of them.

Crack in the keel-  After further forum and online research this boat (I think just the keel) was molded in two pieces, left and right.  So when water dripped into the keel it expanded and contracted through thawing and freezing and split a little open at the leading edge.  The split is about 1/4" in diameter and 5" long.  Nothing too bad, after grinding out one side looks like just needs to dry out.  The issue will be taking care of the water source not just drying it out.


Recoring the outside cabin seats- The moisture meter indicated that the seats were above 35% moisture reading.  This means the odds of plywood rot are very very high under the fiberglass.  So I plan on taking these out as one of the sides already has a clear fracture from a precious owner trying to see under it.  I suspect we may need to just gut the entire cabin fiberglass to get the boat to dry out.

Sealing up two holes in hull- There were two machine drilled holes in the hull, probably for water drainage. One was just forward of the keel on the port side. The other was just above the waterline on the port side about 4 ft from the bow.  This is a pretty easy job with epoxy since they are so small.  The boat has been draining water constantly out of the hole near the keel which is a major indicator of what could be inside the boat.  I suspect it means rip the deck and dry for several days to a week depending on temperature.  
This is the hole drilled near the keel.

Deck- The deck will need to be repainted.  The back part of the deck might need to be recurring, but I will wait and see, it looked to be in good condition.  One option is to strip the paint, recore any areas then instead of painting lay down epoxy and teak/pine deck 1.5" strips.  It would sure look beautiful.  But that is a long way off. Deck hardware will mostly stay might end up getting a winch we will see.

Port Side Dent- This seems to be my most major concern.  On the trailer the port side seems to have dented in. This was not found by the inspector which was a frustration.  From what I have read, it could just be a pressure dent that pops out in the water and off the trailer.  It will certainly effect painting, might just be worth it to float the boat with no paint after all repairs and done and see what happens. That way we can repaint the trailer and what not.  

Trailer- Will most likely need work, two new tires at some point. Possibly upgrading the axle and suspension. But honestly that will be a project for a year after the boat is finished up.

Painting- I am debating on bottom paint, the way I sail will most likely be pulling it out of the water every time not leaving it in. I am kind of opposed to paying for a slip just now. No close good sailing marinas exist.  So, that would dictate a thin freshwater paint like VC17.  Then I hope to put blue paint on the hull with gold bootstrap and maybe blue on the upper deck cabin housing(the area that is currently green above deck).  This is a large ambition but needs to be repainted anyway so we will shoot for the stars. This is easily several months away so will come back to it later.  First the structural problems and drying out the boat.


Tomorrow will work on ripping the seats out to really see how wet it is down there....

Bringing Her Home

So after paying for a marine survey on "Pintail" the Luders 21 and coordinating with a friend I flew up to Ohio to get the boat.  Using a buddies truck we hauled her back to Oklahoma in two days from Huron, Ohio.  We Needed to add lights to the trailer and grease to the bearings which took several hours because the trailer was homebuilt.  It is a very sturdy trailer but the axle and wheels could use some work.  That will be a project once the boat is in the water or on blocks.  Without incident we made the trip, no flats or breaks!

Pictures of "Pintail"


Snow Day in OK!


Just as soon as we got back "Pintail" was covered in snow.  I quickly rushed to get a tarp and cover her exposed cabin.  Something I did not do for the trip out here.  As best I can tell the water damage was so extensive it wasn't work ruining a tarp on the trip out here to try to keep a little water out. Snow stacking up is a different story however.  So, starting to treat her right and care for her.


The Beginning

Life in a land locked state is never easy, especially when you have quite a bit of time on your hands!  My work currently has me on a part time schedule so I took advantage of the lull in work and boredom.  This blog documents  my search and restoration of the "perfect" classic sailboat. 

The Search:  Atfter hundreds of hours of searching I began to develop what kind of boat I wanted.  For a first boat I wanted somthing around 25', having had some postive expierences on a Catalina 250.  Criteria that determined the search:

-A daysailor boat (no overnights)
-A boat with a long bow or stern total length is 20% or greater than LWL
-Classic Northeast sailing vessal, clipper, bermuda racer, schooner etc


Etchells 22


The Ultimate boat in my opinion Bolero a modified Shields
http://www.lackeysailing.com/bolero/bolero.htm


Great candidate examples would be the Shields 30' or the etchells 22' which both have about 40% greater length then LWL.  Also appealing are international one design classes like the IOD 210 or IOD Dragon.

After months of searching I finally lined up a boat fit for the project.  Though intially wanting an etchells, they were a little out of my price range as the base models started around $5000 plus shipping.  So, I found a 21' boat that needed a lot of work, and the price showed.  The boat is a 1971 Luders 21'.  This boat has the lines I like and the right price point.  Because of the low price I hope to really put a lot of nice things on her.  Some ideas I have been floating around with are wood decks, canvas boat cover, blue hull etc...